Meters, Test Kits, Inspection Supplies & Tools!
 Discontinued
Arsenic Water & Soil Test Kit 0-500 ppb (481396-2) 2 Tests, 12 Minutes
Reference only — not for sale
| Model | 481396-2 |
|---|---|
| Manufacturer | ITS |
| Category | Water Testing |
| Status | Discontinued |
Product details (archived)
The information below is retained for reference only. This item is discontinued and cannot be ordered.
Arsenic Water & Soil Test Kit 0-500 ppb (481396-2) 2 Tests, 12 Minutes
Arsenic Quick was designed to give the user accurate results without sacrificing cost and time. Designed using cutting-edge chemistry, Arsenic Quick reports results in only 12 minutes. Additionally, there are no dangerous chemicals needed to run this kit. With only one simple test procedure (using 3 reagents), Arsenic Quick is a must for any lab, water testing professional, or service technician who values accurate, rapid results without sacrificing cost.
- Sensitivity: 0, 5, 10, 20, 50, 100, 200, >500 ppb ( microns;g/L)
- Total test time: 12 minutes
Inorganic Arsenic compounds in the water sample are converted to Arsine (AsH3) gas by the reaction of Zinc Dust and Tartaric Acid. Ferrous and Nickel salts have been added to accelerate this reaction. The Arsine converts the Mercuric Bromide on the test strip to mixed Mercury halogens (such as AsH2HgBr) that appear with a color change from white to yellow or brown. Potassium Peroxymonosulfate is added to oxidize Hydrogen Sulfide to Sulfate.
For better accuracy, we recommend running the test in duplicate for each water sample.
1. For best results, verify that the water temperature is between 68° to 86°
F (ideally 71.6° to 82.4° F).
2. To the Reaction Bottle, slowly and carefully add the water sample to the
upper marked line on the bottle (100 mL).
3. Add 3 level pink spoonfuls of First Quick TM Reagent to the Reaction Bottle.
Cap bottle securely with yellow mixing cap and shake vigorously with bottle
upright for 15 seconds.
4. Uncap Reaction Bottle; add 3 level red spoonfuls of the Second Reagent. Cap bottle securely with yellow mixing cap and shake vigorously with
bottle upright for 15 seconds.
This step allows the test to tolerate Hydrogen Sulfide (H2S) up to 2ppm (mg/L).
If you suspect the presence of H2S by smell or testing, allow the sample to sit
for 2 minutes to minimize H2S interference before proceeding to Step 5.
5. Uncap Reaction Bottle and add 3 level white spoonfuls of Third Reagent. Cap bottle securely with yellow mixing cap and shake vigorously with
bottle upright for 5 seconds.
6. Remove yellow mixing caps. Recap bottles securely using white reaction caps
with turret up (open).
7. Remove Arsenic test strips from the test strip bottle. Immediately recap
the test strip bottle. In order for the results to be accurate, the test strip
must be oriented correctly, and inserted to the correct depth.
Insert the test strip into the turret:
- Position the strip so that the test pad and red line are facing the back of the white reaction cap.
- Insert the strip into the turret until the red line is even with the top of the turret, and close (flip down) the turret. This will hold the test strip in place.
8. Using a timer, time the reaction for 10 minutes. Allow the reaction to occur
in an undisturbed, well-ventilated area. You will notice small hydrogen gas
bubbles being generated.
9. After the 10 minute wait, pull up the turrets and carefully remove the test
strip. Do not touch the reaction pads. Use the Easy-Read Color Chart to
match the reaction pad color. Position the reacted test strip pad behind the
punched holes, view center of test strip pad through the hole, and confirm
precise color match and Arsenic level.
Complete matching within the next 30
seconds. After 30 seconds have elapsed, the colors may begin to change. For best
color matching results, use natural daylight; avoid direct sunlight.
NOTE: If your Arsenic level is 200 ppb or above, you can confirm the elevated levels by diluting the water sample 1 to 5. Fill the Reaction Bottle to the bottom marked line with water sample (20 mL) and add Arsenic-free water to the upper marked line. Now run steps 3 thru 10. For your true Arsenic value, multiply the result by 5 to correct for dilution and record the value.
WARNING: Hydrogen and Arsine gases are generated during the test. Work in a well-ventilated area away from open flames and other sources of ignition. Review the Material Safety Data Sheet before handling any chemicals.
SOIL TEST PROCEDURE
(Non-Digestion Method)
Scope
and Application:
1. This method is valid for detection of Inorganic Arsenic
in soil.
2. The minimum Arsenic detection with 0.5 g of soil is 1.0 mg/kg.
Sample Handling and Preparation (Recommended but not required):
3. Dry soil
for at least 1 hour at 60°C or until completely dry.
4. Remove visible
debris/stones from dried soil.
5. Grind the dried soil into a fine powder and
mix until homogeneous using a coffee grinder or a mortar and pestle.
(a
Coffee Grinder works well)
Interference's:
6. Test tolerates up to 2 mg/kg
of Hydrogen Sulfide, 9000 mg/kg of Iron, and 1500 mg/kg of Lead.
Test
Procedure:
7. Weigh out 0.5 g of the dried soil and transfer to the Reaction
Bottle supplied in the Arsenic Quick™ Kit
(Part # 481396-5). Note: If
the Sample Handling and Preparation steps are omitted, then use 1g of soil. One
gram
is used on assumption that soil is 50% moisture by weight.)
8.
Fill the bottle to the upper marked line on the Reaction Bottle with 100 mL of
Arsenic-free tap water or Distilled water.
9. Follow the standard test
procedure for the Arsenic Quick™ Kit starting with Step 3 on page 3.
Calculation:
10. Multiply the test result by 300 (correction multiplier) to
get the Arsenic concentration in the soil as mg Arsenic/kg
Soil.
(Example: 40 microns;g/L x 300 = 12 mg Arsenic/kg Soil)
NOTE:
Because when
compared to Acid Digestion/ICP-MS Arsenic analysis, this soil screening method
gives typically
50% lower value; a correction multiplier of 300 is used (use
200 as a multiplier if you desire actual measured level).
Available replacements in Water Testing
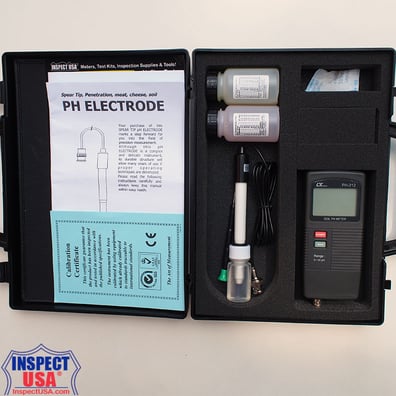
Lutron pH 0-14 Meter Kit (PH-212) Liquids, Soil & Foods
$216.90 now $189.00